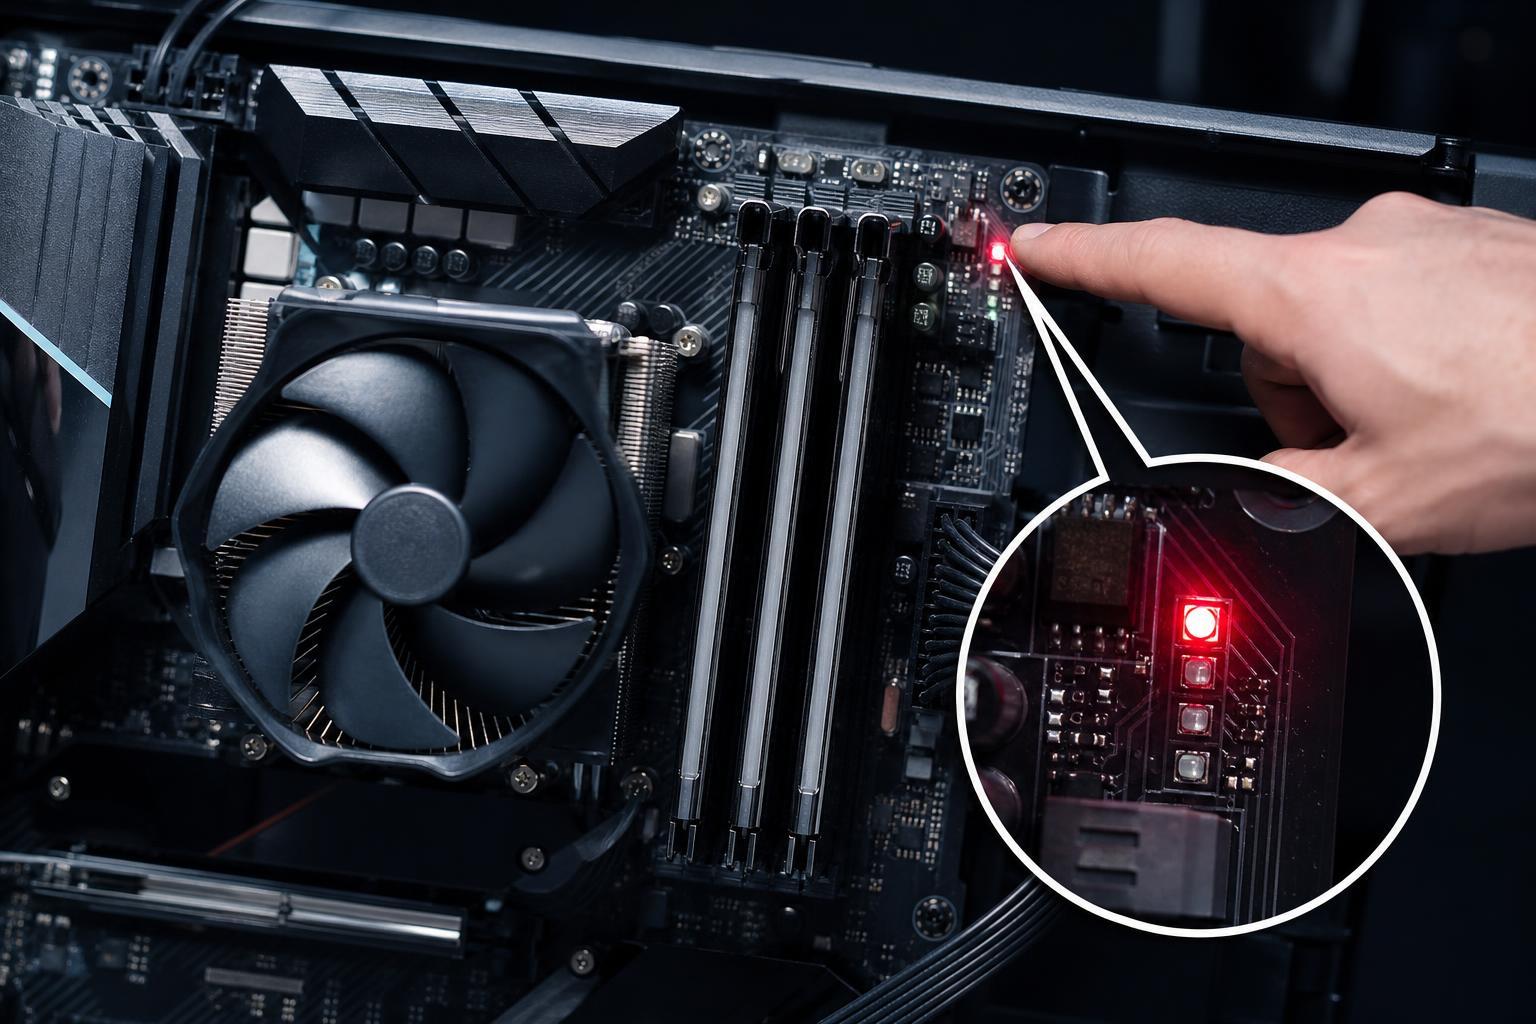
A red light on a motherboard usually means the system has detected a hardware problem during startup. The exact meaning depends on the board, but it often points to power, memory, graphics, storage, or CPU issues.
If your PC powers on but does not display anything, or it shuts off before reaching Windows, the motherboard’s red diagnostic light can help narrow down the cause. The key is to identify which component the light is referring to and test the most likely causes in a sensible order.
Check the Motherboard Label or Manual First
Not every red light means the same thing. Many modern motherboards have debug LEDs with labels such as CPU, DRAM, VGA, or BOOT. Some boards also use multiple small indicator lights or a two-digit code display. Before trying fixes, look closely at the light and check the motherboard manual or the manufacturer’s support page.
1. Reseat the Power Connections
A loose power connection is one of the most common reasons for a motherboard error light. The board may receive partial power, but not enough for a stable boot.
- Turn off the PC and unplug it from the wall.
- Open the case and check the 24-pin motherboard power cable.
- Check the 8-pin or 4+4-pin CPU power cable near the processor socket.
- Make sure the GPU power cables are fully inserted if your graphics card needs them.
- Press each connector firmly into place until it clicks or feels fully seated.
2. Test the RAM Modules
If the debug light points to DRAM or memory, the system may not be able to initialize the RAM properly. Even if the modules were working before, one stick can become slightly unseated during transport or after maintenance.
- Power off the PC and disconnect it from electricity.
- Remove all RAM sticks.
- Install one stick in the slot recommended by the motherboard manual for single-stick testing.
- Try booting the PC.
- If it does not start, move that same stick to another recommended slot or test a different stick.
- Repeat until you find whether one module or one slot is causing the issue.
3. Check the Graphics Card
A VGA or GPU-related red light often means the motherboard cannot detect or initialize the graphics card. This is common on systems with a dedicated GPU, especially if the card is not fully seated or its power connectors are missing.
- Make sure the monitor is connected to the correct output port.
- If you have a dedicated GPU, verify that the display cable is plugged into the graphics card and not the motherboard video port, unless you are testing integrated graphics.
- Remove and reinstall the graphics card if needed.
- Confirm that all required PCIe power cables are connected.
- If your CPU supports integrated graphics, try removing the GPU and booting from the motherboard video output to isolate the problem.
4. Inspect the CPU and Cooler Installation
A CPU light can indicate that the processor is not being detected correctly, the socket has an issue, or the CPU power cable is missing. This can also happen after a cooler installation if too much pressure is applied or the CPU was disturbed during maintenance.
- Check that the CPU power connector is firmly attached near the top of the motherboard.
- Make sure the cooler is mounted evenly and not overtightened.
- If you recently installed the CPU, remove the cooler and inspect the processor for bent pins or misalignment.
- On AMD and some Intel platforms, inspect the socket and CPU carefully before reinstalling.
- Reapply thermal paste if you remove the cooler during the process.
5. Clear the CMOS Settings
Incorrect BIOS or firmware settings can sometimes prevent a successful boot, especially after memory changes, overclocking, or hardware upgrades. Clearing the CMOS restores the motherboard to default settings.
- Turn off the PC and unplug it.
- Use the motherboard CMOS reset jumper if your board has one, following the manual.
- If not, remove the CMOS battery for a few minutes and reinstall it.
- Reconnect power and try booting again.
- If the board has a dedicated Clear CMOS button, use that according to the manufacturer’s instructions.
6. Eliminate Short Circuits and Case Issues
Sometimes the motherboard light is caused by the board touching the case, a misplaced standoff, or another physical short. This is more likely if the problem started after building or moving the PC.
- Check that the motherboard is mounted on the correct standoffs only.
- Make sure no loose screws are trapped under the board.
- Inspect for damaged cables or stray metal objects inside the case.
- If possible, test the board outside the case on a non-conductive surface with only the essential parts installed.
7. Boot With Only Essential Hardware
If the red light remains and the cause is still unclear, reduce the system to the smallest possible working configuration. This helps you determine whether a non-essential part is preventing startup.
- Disconnect all drives except the boot drive, if needed.
- Remove extra USB devices and accessories.
- Leave only the motherboard, CPU, cooler, one RAM stick, and GPU if your system needs one.
- Try booting again.
- Add parts back one at a time until the problem returns.
When the Red Light Points to a Failed Part
If you have tested the power cables, RAM, GPU, CPU installation, CMOS, and minimal hardware setup, the issue may be a faulty component rather than a simple connection problem. At that point, the likely culprits are the RAM stick, graphics card, power supply, motherboard, or CPU itself.
- Try known-good RAM if available.
- Test the graphics card in another compatible system if possible.
- Use a different PSU only if you are confident the replacement is compatible and known to be healthy.
- Check the motherboard manual for diagnostic codes or beep patterns if your board supports them.
- If the system is under warranty, contact the manufacturer before attempting advanced repairs.
What the Red Light Usually Means by Label
If your motherboard has labeled debug LEDs, the label is often the best clue to the underlying issue.
- CPU: processor, socket, or CPU power issue
- DRAM: memory module, slot, or memory settings issue
- VGA: graphics card or display initialization issue
- BOOT: storage device or boot order issue
When to Stop Troubleshooting and Get Help
If you see physical damage, burn marks, bent CPU pins, a swollen capacitor, or a PSU that smells burnt, stop testing and seek professional help or replacement parts. The same applies if the red light stays on after you have narrowed the problem to a specific component and you cannot confirm it with a spare part.
A motherboard red light is often fixable, but it is also a useful warning sign. Working through the most likely causes in order usually leads you to the problem without replacing parts unnecessarily.