
A watermark is a faint background mark that appears behind your document text. In Word, it is commonly used for draft labels, confidentiality notices, or simple branding. The feature is easy to use once you know where to find it, and you can choose a built-in watermark or create a custom one.
This guide shows how to add a watermark in Microsoft Word, how to change it, and how to remove it when you no longer need it.
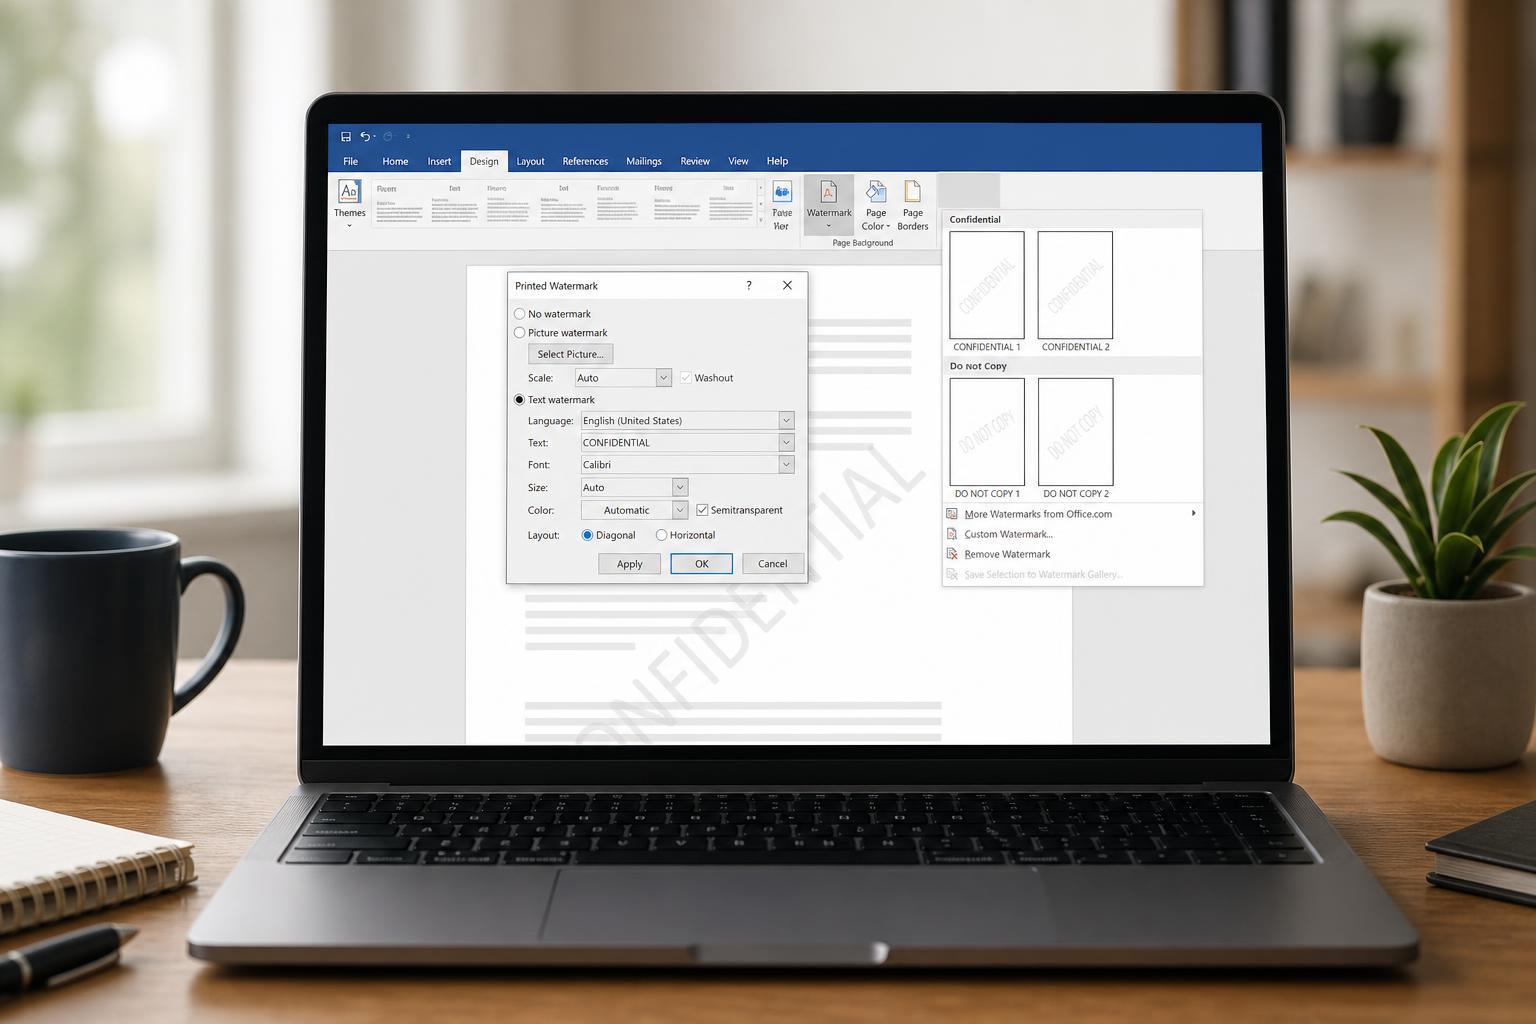
Insert a Built-In Watermark in Word
Word includes several ready-made watermarks, such as Draft, Confidential, and Urgent. These are the fastest option if you just need a simple document label.
- Open your document in Microsoft Word.
- Go to the Design tab on the ribbon.
- Select Watermark near the right side of the toolbar.
- Choose one of the built-in watermark options from the gallery.
Create a Custom Text Watermark
If you want your own wording, such as a company name or project status, you can create a text watermark and control the font, size, color, and layout.
- Open the Design tab and select Watermark.
- Choose Custom Watermark.
- Select Text watermark.
- Type the text you want to appear on the page.
- Pick the font, size, color, and layout options you prefer.
- Click OK to apply the watermark.
Use an Image Watermark
Word can also place a picture behind your document text. This is useful for logos, stamps, or subtle branding on internal documents.
- Go to Design and select Watermark.
- Choose Custom Watermark.
- Select Picture watermark.
- Click Select Picture and choose an image from your computer or online source.
- Adjust the scale if needed, then click OK.
Change the Watermark Appearance
If the default watermark is too dark or too large, Word lets you adjust its appearance before applying it. The main settings are different for text and picture watermarks.
- Text watermarks can be changed by editing the text, font, size, color, and orientation.
- Picture watermarks can usually be adjusted with scale settings.
- A lighter color or lower-contrast image is easier to read over.
- Diagonal watermarks are more noticeable, while horizontal watermarks look more formal.
Remove a Watermark
If you need to clear a watermark from the document, Word has a built-in remove option.
- Open the document.
- Go to Design.
- Select Watermark.
- Click Remove Watermark.
If the Watermark Does Not Show Up Correctly
Sometimes a watermark appears missing, cropped, or inconsistent across pages. That usually means it is being affected by headers, sections, or document layout settings.
- Check whether the watermark was added to all sections or only one section.
- Make sure you are viewing the document in Print Layout.
- If the file uses different headers and footers for odd and even pages, the watermark may not appear the same everywhere.
- Confirm that the image or text is not hidden behind another element in the header area.
When to Use a Watermark
Watermarks are useful when you want a document to be identifiable at a glance without changing the main content. They are especially helpful for internal review copies and branded paperwork.
- Draft documents
- Confidential files
- Training materials
- Internal forms
- Light branding on templates
Quick Recap
To add a watermark in Word, open the Design tab, choose Watermark, and pick either a built-in option or a custom text or picture watermark. If you no longer need it, return to the same menu and remove it. For the best result, keep the watermark subtle so the document remains easy to read.





